Pages

DIY Off-Grid Cabin Shed: Build a Cozy and Independent Shelter

Tuesday, February 4, 2025

DIY Off-Grid Cabin Shed: Build a Cozy and Independent Shelter

The allure of self-sufficiency and a connection with nature is driving many to explore off-grid living. A crucial element of this lifestyle is securing reliable shelter, and constructing a DIY off-grid cabin shed provides a practical and fulfilling solution. This detailed guide provides a comprehensive overview of planning, construction, and equipping your own independent haven.

Phase 1: Planning and Preparation

Site Selection and Assessment

The success of your off-grid cabin shed hinges on careful site selection. Consider the following factors:

  • Accessibility: Ensure convenient access for material delivery and future maintenance, even considering potential seasonal challenges.
  • Sunlight Exposure: Optimize solar gain for natural heating and lighting. South-facing locations (in the Northern Hemisphere) are generally ideal.
  • Water Source: Proximity to a reliable water source (spring, well, or rainwater collection system) is paramount.
  • Soil Conditions: Assess the soil's stability and drainage to determine appropriate foundation techniques.
  • Legal Considerations: Verify local building codes and regulations pertaining to off-grid structures and obtain necessary permits.

Design and Blueprint Creation

Developing a detailed blueprint is vital for efficient construction. Consider factors such as:

  • Size and Layout: Determine the necessary square footage based on intended use and occupancy. Plan for efficient space utilization.
  • Material Selection: Choose durable and readily available materials suited to your climate and budget. Consider locally sourced timber for environmental sustainability.
  • Foundation Type: Select a foundation appropriate for the soil conditions and anticipated load. Options include slab-on-grade, pier and beam, or a simple timber frame.
  • Insulation Strategy: Implement effective insulation to minimize energy consumption and maintain comfortable interior temperatures. Consider natural insulation options such as straw bales, sheep's wool, or cellulose.
  • Window Placement: Strategically position windows to maximize natural light and ventilation while minimizing heat loss.

Gathering Materials and Tools

Creating a comprehensive materials list is crucial for efficient construction and minimizes unforeseen delays. Procure all necessary materials well in advance. Essential tools include:

  • Measuring Tapes and Levels: Accurate measurements are crucial for structural integrity.
  • Hand and Power Tools: A range of saws, drills, hammers, and possibly a post hole digger will be needed.
  • Safety Gear: Prioritize safety by using appropriate protective equipment such as gloves, safety glasses, and hearing protection.
  • Fasteners: Ensure an adequate supply of nails, screws, bolts, and other fasteners appropriate for the chosen materials.
  • Building Materials: This list will be highly dependent on the chosen design but will include lumber, insulation, roofing materials, and exterior cladding.

Phase 2: Construction

Foundation Construction

The foundation is the cornerstone of a stable structure. The chosen method will depend on the site assessment and design. For a simple shed, a pier and beam foundation might suffice. This involves digging holes, setting concrete piers, and then building a timber frame on top. A more substantial structure might require a concrete slab foundation for increased stability.

Framing and Wall Construction

Once the foundation is complete, the framing process begins. This involves erecting the main structural elements, including walls, floors, and roof trusses. Accuracy in measurements and precise cuts are crucial for structural integrity. The chosen wall construction method might be traditional stud framing or more innovative techniques such as timber framing or straw bale construction.

Roofing and Exterior Cladding

The roof should be designed to withstand local weather conditions. Options include gable, shed, or hip roofs. Appropriate roofing materials, such as metal sheeting or asphalt shingles, should be selected based on durability and budget. Exterior cladding, such as wood siding, metal panels, or even reclaimed materials, adds protection and aesthetic appeal.

Interior Finishing and Insulation

Once the exterior shell is complete, focus on interior finishing. This includes installing insulation, drywall or other interior wall coverings, flooring, and any built-in features such as shelving or cabinetry. Careful attention should be paid to sealing any gaps or cracks to prevent drafts and improve energy efficiency.

Window and Door Installation

Windows and doors should be installed securely, ensuring weather tightness. Consider energy-efficient options to minimize heat loss. Proper sealing around frames is crucial for insulation and draught prevention. Select durable materials that can withstand the elements.

Phase 3: Off-Grid Systems and Finishing Touches

Water Collection and Storage

An off-grid cabin requires a reliable water source. Rainwater harvesting is a common solution, involving a collection system directing rainwater to a storage tank. Consider filtering and purifying the collected water for safe consumption.

Power Generation

Off-grid power generation relies on renewable energy sources like solar panels or wind turbines. Consider battery storage for reliable power supply during periods of low generation. Proper system sizing and maintenance are essential.

Waste Management

Develop a sustainable waste management strategy, including composting toilets and responsible waste disposal practices. Consider greywater recycling systems to conserve water.

Heating and Cooling

Effective heating and cooling are crucial for comfort. Passive solar design, combined with efficient insulation and potentially a wood-burning stove or alternative heating system, will ensure a comfortable living space. Ventilation is key for managing humidity and air quality.

Interior Furnishing and Decoration

Complete the cabin with comfortable and functional furnishings. Prioritize lightweight and durable options suited for the off-grid environment. Consider aesthetically pleasing decoration that complements the natural surroundings.

Conclusion

Building a DIY off-grid cabin shed is a challenging but immensely rewarding undertaking. Careful planning, meticulous construction, and a commitment to sustainable practices are crucial for success. This guide provides a framework for your journey towards self-sufficient living, offering a sanctuary connected to nature and free from the constraints of the grid.

Remember to prioritize safety throughout the entire process and consult with relevant professionals when needed. Enjoy the journey of creating your own unique and independent shelter.

Read more ...

Garage Shed Foundation Plans: Choose the Best Base for Stability

Tuesday, February 4, 2025

Garage Shed Foundation Plans: Choosing the Best Base for Stability

Building a garage shed is a rewarding project, but a stable foundation is paramount. A poorly constructed base will lead to cracks, settling, and ultimately, a compromised structure. This article guides you through choosing the best foundation for your garage shed, considering factors like soil conditions, budget, and the shed's size and intended use. We'll explore different foundation types, highlighting their pros and cons to help you make an informed decision.

Assessing Your Site: The Foundation of a Solid Plan

Before even considering foundation types, thoroughly assess your site. This crucial first step prevents costly mistakes later. Begin by examining the soil. Is it primarily clay, sand, gravel, or a mix? Clay soils expand and contract significantly with moisture changes, making them problematic for foundations. Sandy or gravely soils tend to be more stable. You should also consider the water table – how high is the groundwater level? High water tables can undermine even the strongest foundations. Finally, consider the slope of the land; a sloped site requires extra planning and potentially more extensive excavation.

Foundation Options: Weighing the Pros and Cons

Several foundation types suit garage sheds, each with unique advantages and disadvantages:

1. Concrete Slab Foundation: A Solid Choice for Most

A concrete slab foundation provides exceptional stability and is relatively easy to pour. It's ideal for smaller to medium-sized sheds on stable soil. Pros: Level surface, excellent load-bearing capacity, relatively inexpensive. Cons: Requires a significant amount of excavation, susceptible to cracking on unstable soil, and can be difficult to repair if damaged.

2. Pier and Beam Foundation: Ideal for Uneven Terrain

Pier and beam foundations are perfect for uneven terrain or areas with poor soil drainage. Concrete piers are driven into the ground, and a framework of beams supports the shed's floor. Pros: Excellent for sloping sites, allows for ventilation and drainage beneath the structure, relatively easy to build. Cons: More expensive than a slab foundation, requires more skilled labor, and may be less stable than a slab on stable soil.

3. Gravel Base Foundation: A Budget-Friendly Option

A gravel base provides a simple, cost-effective solution for sheds in well-drained areas. A compacted layer of gravel serves as the foundation, topped with a wooden or composite floor. Pros: Extremely inexpensive, requires minimal excavation, simple to construct. Cons: Offers limited stability compared to concrete, susceptible to settling, and not suitable for heavy sheds or areas prone to flooding.

Choosing the Right Foundation for Your Needs

The ideal foundation depends on several factors:

  • Budget: Gravel is the cheapest, followed by a concrete slab, with pier and beam being the most expensive.
  • Soil conditions: Clay soils need a pier and beam or a reinforced concrete slab. Stable soil can support a slab or gravel base.
  • Shed size and weight: Heavier sheds require stronger foundations like concrete slabs or pier and beam systems.
  • Local building codes: Always check local building codes and obtain necessary permits before starting construction.

Remember, investing in a solid foundation is crucial for the longevity and stability of your garage shed. Take your time to assess your site, consider the options outlined above, and choose the best foundation to ensure your project is a success for years to come.

Read more ...

Modern Shed Plans: Stylish and Functional Designs

Tuesday, February 4, 2025

Modern Shed Plans: Stylish and Functional Designs

Forget the drab, utilitarian sheds of yesteryear. Today's modern shed designs seamlessly blend style and functionality, transforming these backyard structures into versatile extensions of your living space. Whether you envision a tranquil artist's studio, a home gym, a she-shed haven, or simply extra storage, the possibilities are as limitless as your imagination. These meticulously crafted plans offer a wealth of inspiration, empowering you to build a shed that perfectly complements your home and lifestyle.

Designing Your Dream Shed: Functionality Meets Aesthetics

The journey to your dream shed begins with careful planning. Consider its primary function: will it serve as a workshop bursting with tools, a peaceful retreat for reading and relaxation, or a combination of both? This crucial decision shapes every subsequent design element. Think about the size; a small shed might suffice for basic storage, while a larger structure allows for more ambitious projects. Don't underestimate the importance of natural light; strategically placed windows not only brighten the interior but also create a welcoming atmosphere. The exterior finish is equally vital; choose materials that reflect your personal style and withstand the elements – think sleek metal siding, rustic reclaimed wood, or a sophisticated combination of both.

Choosing the Right Materials: Durability and Style

The materials you select significantly impact the shed's longevity, appearance, and overall cost. Durable and weather-resistant materials are key to long-term success. Consider these options:

  • Cedar or Redwood: These naturally resistant woods provide beautiful aesthetics and require minimal maintenance.
  • Metal Siding: Offering exceptional durability and low maintenance, metal is a popular choice for its clean, modern look.
  • Composite Materials: Combining the best of wood and plastic, these materials boast impressive strength and resistance to rot and insect damage.
  • Concrete or Stone Foundation: Provides a robust base and elevates the shed's aesthetic appeal.

Incorporating Modern Design Elements

Modern shed designs transcend traditional notions of functionality. They prioritize clean lines, minimalist aesthetics, and thoughtful integration with the surrounding landscape. Large windows maximize natural light and create a connection with the outdoors. Sliding barn doors add a touch of rustic charm while optimizing space. Consider incorporating clever storage solutions, like built-in shelving and overhead racks, to maintain organization. Even the smallest details, such as carefully chosen hardware and lighting fixtures, contribute to the overall design's impact. Remember, the shed's exterior should complement your home's architecture, creating a cohesive and visually pleasing ensemble.

Beyond the Basics: Adding Unique Features

Don't limit your vision to the ordinary. Modern shed designs offer the opportunity to incorporate unique features that truly personalize your space. Consider these possibilities:

  • Skylights: Flood the interior with natural light and enhance the sense of spaciousness.
  • Outdoor Deck or Patio: Extend the usable area and create an inviting space for relaxation or entertaining.
  • Energy-Efficient Features: Incorporate insulation and energy-efficient windows to reduce utility costs.
  • Smart Home Technology: Integrate smart lighting, security systems, and climate control for added convenience.

With careful planning and attention to detail, your modern shed will become more than just a storage space; it will be a valuable addition to your property, enhancing your lifestyle and reflecting your unique personality.

Read more ...

Guest House Shed Plans: Turn Your Shed into a Tiny Home

Tuesday, February 4, 2025

Guest House Shed Plans: Turn Your Shed into a Tiny Home

So, you're dreaming of a cozy guest house, but the budget (and maybe your land) is a little tight? Don't despair! You might be surprised at how much you can achieve by transforming a humble shed into a charming and functional tiny home. It's a project that combines creativity, resourcefulness, and a dash of DIY magic. Let's dive into the possibilities of turning your shed into a guest haven!

Planning Your Guest House Shed Conversion

Before you grab your hammer and nails (well, maybe *after* you grab your blueprints!), careful planning is key. This isn't just about slapping some paint on the outside; we're talking about creating a comfortable and safe living space.

Assess Your Existing Shed

Start with a thorough evaluation of your current shed. What's its size? What's its structural integrity? Is it sturdy enough to handle the extra weight of insulation, fixtures, and furnishings? Are there any signs of rot, pest infestation, or foundation issues? Honest self-assessment is crucial here. If the shed is beyond repair, starting from scratch might be a more cost-effective solution in the long run. However, a solid existing structure can save you a significant amount of money and time.

Legal Considerations: Permits and Zoning

This is a big one! Before you even think about buying lumber, check your local building codes and zoning regulations. Converting a shed into a habitable dwelling often requires permits. Ignoring this step can lead to hefty fines, and even force you to undo your hard work. Do your research, contact your local authorities, and understand the requirements for building permits, inspections, and potential limitations on size and usage.

Design and Functionality

Think about the essentials for a comfortable guest stay. How many guests will it accommodate? Will you need a sleeping area, bathroom, kitchenette, or simply a cozy sitting area? Sketch out a floor plan. Even a simple drawing will help you visualize the space and ensure you're maximizing every square foot. Remember, tiny doesn't have to mean cramped! Clever design and multi-functional furniture can work wonders.

Construction and Renovation

Now for the fun (and potentially messy!) part. The level of renovation needed depends heavily on the condition of your existing shed and your desired level of luxury.

Foundation and Structure

If your shed has a weak foundation, addressing this is paramount. You might need to reinforce the existing base or even build a new one entirely. Consider the weight of your finished structure and ensure the foundation can handle it. If you're adding significant features like a bathroom, a solid foundation is non-negotiable.

Insulation and Weatherproofing

Proper insulation is vital for a comfortable living space, especially if you plan on using the guest house year-round. Consider adding insulation to the walls, ceiling, and floor. This will help regulate temperature, reduce noise, and improve energy efficiency. Also, pay close attention to weatherproofing. Seal any cracks or gaps to prevent drafts and moisture damage. Consider using high-quality windows and doors to further improve insulation and weather resistance.

Plumbing and Electrical

Installing plumbing and electrical systems is often best left to qualified professionals. This involves running water lines, installing a toilet and sink (if you're adding a bathroom), and ensuring safe and compliant electrical wiring. These are essential elements for creating a safe and functional living space.

Interior Finishes

Once the structure is sound and the utilities are in place, you can focus on the interior finishes. This is where your creativity can truly shine! Choose materials that are aesthetically pleasing and durable. Think about the overall style you're going for – rustic, modern, minimalist, etc. Consider the use of space-saving furniture, clever storage solutions, and light-colored walls to make the space feel larger and brighter.

Adding the Finishing Touches

The little details can make all the difference in creating a welcoming and inviting guest house.

Furnishing Your Tiny Guest House

Choose furniture that is both functional and stylish. Multi-functional pieces are your best friend in a tiny space. A sofa bed, for example, can serve as both seating and a sleeping area. Look for furniture that's easy to move around and can be easily stored away when not in use.

Lighting and Decor

Proper lighting is crucial for creating a warm and inviting atmosphere. Consider using a combination of ambient, task, and accent lighting. Add some personal touches with artwork, plants, and decorative items to create a cozy and welcoming space for your guests. Don't underestimate the power of soft textiles like rugs and throws to add warmth and comfort.

Outdoor Enhancements

Don't neglect the exterior! A well-landscaped area around the guest house can significantly enhance its appeal. Consider adding a small patio, garden, or fire pit to create a relaxing outdoor space where guests can unwind and enjoy the scenery. A simple walkway leading to the shed can make a huge difference too.

Commonly Asked Questions

  • Q: How much does it cost to convert a shed into a guest house? A: The cost varies dramatically depending on the size of the shed, the extent of renovations needed, and the materials used. You could spend anywhere from a few thousand dollars to tens of thousands.
  • Q: Do I need planning permission? A: Absolutely. Check your local council's guidelines. Regulations vary greatly by location.
  • Q: Can I do this myself? A: Some aspects are definitely DIY-friendly (painting, decorating), but plumbing and electrical work should usually be done by licensed professionals.
  • Q: How long does it take? A: This depends on the complexity of the project and your experience. Expect it to take several weeks to several months.
  • Q: What about insulation? A: Proper insulation is crucial for a comfortable, energy-efficient space. Consider options like spray foam, fiberglass batts, or rigid foam boards.
  • Q: What type of shed is best for conversion? A: A well-built, sturdy shed with a solid foundation is ideal. Metal sheds might need more work than wooden sheds.
  • Q: Can I add a bathroom? A: Yes, but it will add significant complexity and cost to the project, requiring professional plumbing work.
  • Q: What about fire safety? A: Comply with all local building codes regarding smoke detectors, fire extinguishers, and escape routes.

Turning your shed into a guest house can be a rewarding project. With careful planning, attention to detail, and maybe a little help from friends, you can create a charming and functional space that your guests will love. Happy building!

Read more ...

Small Lofted Shed Plans – Free & Budget-Friendly

Saturday, February 1, 2025

Small Lofted Shed Plans – Free & Budget-Friendly

Dreaming of a charming, functional shed without breaking the bank? A small lofted shed offers incredible storage potential in a surprisingly compact footprint. This article provides you with the information and inspiration you need to build your own, utilizing free plans and budget-friendly materials. Prepare to transform your outdoor space with a structure that's both aesthetically pleasing and incredibly practical.

Why Choose a Small Lofted Shed?

Small lofted sheds pack a big punch. Their elevated storage area maximizes vertical space, doubling—or even tripling—your storage capacity compared to a standard shed of the same footprint. This is perfect for storing seasonal items, gardening tools, sports equipment, or even creating a miniature workshop. Think of it: your lawnmower sits below, while holiday decorations rest safely out of the way upstairs! The compact size makes them ideal for smaller yards, while the loft adds a touch of architectural charm.

Finding Free Shed Plans

The internet is a treasure trove of free shed plans. Websites like Pinterest, Instructables, and various woodworking forums offer a vast selection. Search for terms like "small lofted shed plans," "8x8 lofted shed plans," or "6x8 lofted shed plans" to narrow your results. Remember to carefully review the plans before starting your project. Check for clarity, material lists, and detailed instructions. A well-documented plan will significantly simplify your building process. Don't hesitate to download several sets of plans and compare their designs and features to find the perfect fit for your needs and skill level.

Tips for Choosing the Right Plan:

  • Consider your available space and the overall dimensions of the shed.
  • Evaluate the complexity of the design. Choose a plan that matches your woodworking skills.
  • Check the materials list to ensure you can source the materials locally and affordably.
  • Look for plans with clear, step-by-step instructions and diagrams.

Budget-Friendly Building Materials

Building a budget-friendly shed requires smart material choices. Consider using reclaimed lumber or purchasing discounted materials from salvage yards or building supply outlets. Pressure-treated lumber is essential for longevity, but you can save money by choosing less expensive grades for less critical structural components. Think creatively: repurposed pallets can be used for siding or internal shelving. This approach not only saves money but also adds a unique, rustic touch to your finished shed.

Saving Money on Materials:

  • Shop around for the best prices on lumber and other materials.
  • Consider using alternative materials such as recycled pallets or metal roofing.
  • Buy in bulk when possible to receive discounts.
  • Reuse any existing materials you may have.

Building Your Small Lofted Shed

With your plans and materials gathered, it's time to build! Follow the instructions meticulously. Take your time, ensuring each step is completed accurately. Don't rush the process; quality construction leads to a more durable and longer-lasting shed. If you encounter any difficulties, consult online resources or seek advice from experienced builders. Remember to prioritize safety throughout the entire process, using appropriate safety gear and following all building codes.

Enjoy Your New Storage Space!

Congratulations on building your own small lofted shed! Enjoy the satisfaction of creating something useful and beautiful with your own hands. Your new shed will provide years of reliable storage and enhance the aesthetic appeal of your property. And remember, the cost savings and the pride of accomplishment are immeasurable benefits that go far beyond the monetary value of the project itself.

Read more ...

How to Build a Sturdy Loft for Your Shed – Free Plans

Friday, January 31, 2025

Maximize Your Shed Space: Build a Sturdy Loft with Free Plans

Tired of cramped storage in your shed? Transform unused vertical space into valuable storage with a loft! This guide provides free plans and detailed instructions to build a robust and safe loft, perfect for storing seasonal items, tools, or anything you need to keep off the ground. We'll walk you through each step, from planning to finishing touches, ensuring you create a loft that's as functional as it is sturdy.

Planning Your Shed Loft: Measurements and Materials

Before you even pick up a saw, careful planning is crucial. Begin by accurately measuring your shed's interior dimensions. Determine the desired loft size, ensuring adequate headroom below and enough space for easy access. Don't forget to consider the weight your loft will bear – this will influence your material choices. For this project, we recommend pressure-treated lumber for its durability and resistance to rot and insects. A sturdy 2x6 frame will provide a strong base, while plywood forms the loft floor. Remember to check local building codes before starting your project.

Essential Materials List:

  • Pressure-treated lumber (2x6s for the frame, 2x4s for support beams)
  • Plywood for the loft floor (choose a thickness appropriate for the anticipated weight)
  • Screws (exterior-grade, various lengths)
  • Wood glue
  • Safety glasses and work gloves
  • Measuring tape, level, saw (circular saw or hand saw), drill

Constructing the Loft Frame: A Step-by-Step Guide

With your materials gathered and measurements finalized, it's time to build the loft frame. Start by constructing two parallel support beams across the width of your shed, ensuring they are level and securely fastened to the shed's walls using appropriate fasteners. These beams will form the base for your loft's structure. Next, build the sides of the frame, using 2x6s to create a rectangular structure, joining them securely to the support beams. Remember to regularly check your work with a level to maintain structural integrity. Accuracy here is key for a stable loft.

Securing the Frame:

Employ a combination of screws and wood glue for maximum strength. Pre-drill pilot holes to prevent the wood from splitting. For added stability, consider adding diagonal bracing to the corners of the frame. This extra support will prevent any unwanted flexing or movement of the structure over time.

Installing the Loft Floor: Creating a Safe and Stable Surface

Once the frame is complete and securely fastened, you can install the plywood flooring. Cut the plywood sheets to fit snugly within the frame, ensuring a tight and even surface. Begin by installing the plywood sheets, securing them to the frame with screws placed every 6 to 8 inches. Stagger the seams of the plywood sheets to enhance stability and prevent weak points. Ensure that the plywood is securely attached to the frame, avoiding any gaps or loose sections. Once completed, inspect your work carefully to ensure even support.

Adding Access and Finishing Touches: The Final Steps

Now that the structure is complete, think about access. A sturdy ladder or a built-in staircase provides safe access to your new loft storage. You can personalize your loft by adding paint or stain for protection and aesthetic appeal. Consider adding extra bracing if you plan on storing heavier items. Remember to regularly inspect the loft's structure and fasteners for any signs of wear and tear. With a little effort, you'll have a sturdy loft that significantly increases your shed's storage capacity.

Safety First:

Always prioritize safety. Wear appropriate safety gear throughout the entire process. If you are unsure about any aspect of the construction, consult a qualified builder or professional for assistance. A well-built shed loft is a valuable addition to any property, providing much-needed extra storage space.

Read more ...

10x12 Lofted Shed Plans – Free Backyard Storage Ideas

Friday, January 31, 2025

10x12 Lofted Shed Plans – Free Backyard Storage Ideas

Dreaming of a spacious, organized backyard? A 10x12 lofted shed offers the perfect blend of storage and functionality. This versatile structure provides ample room for all your outdoor equipment, tools, and seasonal items, while the loft maximizes vertical space, creating even more storage capacity. Forget cramped garages and overflowing closets – let's explore the possibilities of building your own 10x12 lofted shed using free plans and a dash of DIY spirit!

Why Choose a 10x12 Lofted Shed?

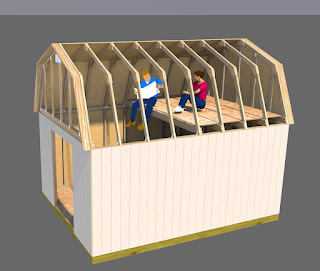
The 10x12 footprint provides a generous amount of floor space, easily accommodating lawnmowers, bicycles, gardening tools, and more. But it's the loft that truly sets this shed apart. This elevated storage area is ideal for items you use less frequently, keeping them safe from moisture and dust while maximizing your available space. Imagine storing holiday decorations, off-season clothing, or even creating a cozy workspace in your loft! The added height also enhances the shed's overall aesthetic appeal, making it a beautiful addition to your backyard landscape. The best part? You can build it yourself, saving significant money compared to purchasing a pre-built shed.

Finding Free 10x12 Lofted Shed Plans

The internet is a treasure trove of resources for DIY enthusiasts! Numerous websites offer free 10x12 lofted shed plans, often with detailed blueprints, cut lists, and step-by-step instructions. However, remember to thoroughly vet any plans you find. Look for plans with clear diagrams, comprehensive material lists, and user reviews attesting to their accuracy and ease of construction. Always double-check measurements and adapt plans to your specific needs and local building codes.

Where to Look for Free Plans:

  • Online forums and communities: Dedicated DIY forums often feature users sharing their custom shed plans.
  • DIY blogs and websites: Many woodworking and home improvement blogs provide free shed plans with detailed instructions and photos.
  • YouTube channels: Visual learners will find many helpful videos demonstrating the construction process of various shed designs.

Building Your 10x12 Lofted Shed: A Step-by-Step Overview

Constructing a shed is a rewarding project, but it requires careful planning and execution. Begin by preparing your site; level the ground, obtain necessary permits (check your local regulations), and gather all the materials listed in your chosen plans. Framing the shed's walls and floor is the first crucial step. Ensure accurate measurements and use appropriate fasteners for a strong and stable structure. Next, erect the walls and install the roof, paying close attention to proper roofing techniques to ensure weather resistance. Finally, construct the loft structure, adding supports and ensuring stability before installing the loft floor. Remember safety first! Always wear appropriate safety gear and use proper lifting techniques.

Finishing Touches and Personalization

Once your shed's structure is complete, it's time to personalize your space. Consider adding windows for natural light and ventilation. Paint the exterior to match your home's style or choose a bold color to make it a statement piece. Install shelving and storage solutions inside to maximize the use of available space, both on the ground floor and in the loft. The possibilities are endless! Create a customized workspace, a potting shed for your gardening hobby, or simply a clean, organized area for all your outdoor equipment.

Enjoy Your New Backyard Storage Solution!

Building your own 10x12 lofted shed is a challenging but fulfilling undertaking. With careful planning, the right free plans, and a little elbow grease, you can create a functional and aesthetically pleasing addition to your property that will serve you for years to come. So, grab your tools, download those plans, and get ready to transform your backyard!

Read more ...